My apologies for having gone missing from the blogoshpere for the last month but I was indeed missing in action! The base of operations for Baby Flava International (aka my home) has moved! We literally did all of the moving ourselves but at long last we are now proud to call ourselves Pittsburgers. This is a fantastic city for a young family and we are eager to take advantage of all that Pittsburgh has to offer us.
Once we get settled into our new city and our new job (for me) and PhD program (for Daddy Flava) look for new blog posts about healthy carrot cookies, the juice debate, soba noodles, and terrible toddler teeth.
- Mama Flava -
Wednesday, August 27, 2008
Monday, July 21, 2008
Zucchini Sticks
A few weeks ago I read the "great tips" section of a parenting magazine which suggested sending elementary school age kids with "sticks and dip" for lunch. Carrots, cucumbers, or red peppers were listed as "stick" options and hummus, yogurt, or peanut butter were listed as potential dips. I thought this was a very cute idea that could easily be adapted to a toddler.
So last week I tried feeding Baby Flava cucumber and red pepper (without the peal) sticks with yogurt for lunch but unfortunately it was not a very successful experiment. Mostly BF just used the veggies as a vehicle to deliver the yogurt to her mouth! I was happy that got (and enjoyed) the idea of dipping but realized quickly that we will need to keep working on raw veggies. In the meantime however, I came up with an alternative that works ... sauteed zucchini and summer squash sticks. This couldn't be a simpler meal/snack to prepare and given the abundance of squash and zucchini this time of year, it is a great way to take advantage of your local Farm Stand.
Heat a non-stick skillet with 1 t of olive oil. Slice 3-4 small squash and zucchini into strips that are approximately 2 inches long by 1/4 inch wide. Once the pan is warm add the veggies and saute until slightly caramelized and soft, season with a dash of pepper. Serve with your dip of choice!
- Mama Flava -
Monday, July 14, 2008
Spiced Strawberry Sorbet
To expand upon Mama Flava's Strawberry theme from last month, here is a wonderful sorbet recipe I adapted slightly from one I found on epicurious.com. This recipe adds a kick to ordinary strawberry sorbet for older kids, but can easily be made "straight" for toddlers. When I used this for my demos kids loved it just as much as the adults. The black peppercorns and balsamic vinegar add a wonderful depth of flavor and change the ordinary into the extraordinary.
Spiced Strawberry Sorbet
Serves 6-8
Prep time: 20 minutes plus chill time for ingredients and ice cream maker
Cook time: 5 minutes
Ingredients:
2/3-cup sugar (or agave nectar)
2/3-cup water
2 Tablespoons black peppercorns crushed coarse
1-quart strawberries hulled
2 Tablespoons balsamic vinegar or to taste
Preparation:
In a saucepan combine sugar and water and bring to a boil, stirring until sugar is dissolved. Stir in peppercorns and remove pan from heat. Cover pan and let syrup stand 1 hour.
Strain syrup through a fine sieve into a food processor or blender and discard peppercorns. Purée hulled strawberries with syrup until very smooth and force though sieve into a bowl, discarding seeds and other solids. This makes a very smooth sorbet...if you like it a bit chunkier do not strain. Stir in vinegar and chill, covered, until cold. Freeze mixture in an ice-cream maker.
You may use this basic recipe for most fruit sorbets leaving out the peppercorns and balsamic vinegar.
So for a nice cool fruity dessert try the strawberry ice cream, or if you want to leave out the fat/milk and cream...try the spiced sorbet. It's lovely on the tongue!!!
- Grammie Flava -
Saturday, July 5, 2008
Food Fights
I recently met a new mom with whom I have a lot in common. She has a 15 month old son (Baby Flava is 18 months) and we seem to frequent all of the same mommie-and-me haunts in suburban Baltimore. My new mom friend is also wholly committed to feeding her son healthy, homemade, well-rounded meals. We share recipe ideas, talk about how to use whole grains, and of course -- we swap stories about food fights. It seems like there is nothing more stressful to a young mom than lovingly preparing a delicious and nutritious meal for their little one only to have it thrown back in their face, literally!
My advice to this new friend, and to myself is to take a deep breath and keep plugging along. Although you may loose many a food fight, in the long run you will win the war. By feeding your child a wide variety of healthy foods and exposing him/her to many different flavors and textures you are paving a path for great eating habits in the future. Plus, you are in the process of building a person! All of the whole grains, veggies, and good protein you can get into them now will help them in growing strong bones and a big 'ol brain. So, when your little one flings cucumber sticks over the side of the high-chair for the third time today, just retire the cukes for today and try again later.
Two important things to remember in the heat of battle!
1) Your little one is -- LITTLE. Consider those five bits of spinach a victory!
2) Let them eat peas! Baby Flava loves peas and I feed then to her almost every single day. If there is one veggie that works for your kid, load them up on that veggie during what is usually the most stressful meal. Save the experimentation for the time when you have the most patience.
- Mama Flava -
Tuesday, June 24, 2008
The Truth About Bananas
 Daddy Flava here:
I’d like to write about a very exotic fruit- the banana. For many American babies – mashed bananas is the first solid food they will taste. Baby Flava loves herself a banana; she can eat an entire one in a single sitting. She even loves the Banana Boat song!
Lately, I’ve been receiving several emails and links about the imminent death of the banana. You read that correctly, the banana is dying. Given that some of the previous topics in this blog have been considered controversial, let’s really examine if it’s time to play the funeral dirge for Baby Flava’s favorite fruit.
The basic premise is that there is a fungus that is wiping out the particular plant that produces the bananas we get from the supermarket, known as the Cavendish. The articles and emails go on to say that this happened before in the 60’s with another variant of the banana that we used to eat, the Gros Michel. The Gros Michel was a tastier version of the banana but due to disease/fungus it’s now extinct. A lot of these articles usually end by blaming large agro as the cause of the banana’s demise.
But hold on….the Gros Michel is not extinct and neither is the Cavendish is any danger or extinction. What did happen is that diseases made the Gros Michel not suitable for mass production and it looks like the same will happen to the Cavendish. In other words, we (the American consumer) might not have access to the same cheap bananas we currently buy.
The susceptibility of the banana to disease is because of its sterile nature (ever wonder where the seeds are?). It’s, IMHO, a really interesting plant and I encourage you to read more about it if you are curious. Wait till you find out about the banana industry!!!
So here’s the question: Are we soon never going to be able to eat a banana again? I think that any amount of panic is probably unnecessary (unless your main livelihood is based on the current banana industry). Scientists are working on genetic variations that would be more disease resistant. Also, we could start eating other types of banana, some of which I understand are tastier (but a little seedier) than what we currently eat. We might even have to wait for banana’s to be in-season like other fruit.
Of course, I sure hope this doesn’t result in higher banana prices. That’s one hardship I’m not really prepared to handle. However, I don’t think that future generations will have to live without bananas.
But it might be nice if some bananas disappeared forever.
Tuesday, June 17, 2008
Homemade Strawberry Ice Cream
 I don't often feed Baby Flava sweets however, now that summer is almost here I don't think I can deny her our absolute favorite warm weather treat -- ice cream. Last week I came home from a local farmers market with two pounds of fresh strawberries and decided that homemade strawberry ice cream was in order. The finished product was delicious and it was no surprise that BF loved it. Her first few bites of ice cream were a bit shocking to her but after she realized that the flavor was worth the cold burst she kept coming back for more, waiting for the spoon with her mouth open like a baby bird.
We have a Cuisinart ice cream maker at home, which we really like but there are many other wonderful products out there that allow you to make ice cream at home.
Strawberry Ice Cream
2 lbs fresh organic strawberries
4 T fresh squeezed lemon juice
1/2 C sugar
1/2 C Agave nectar
2 C whole milk
2 C heavy cream
1 T vanilla
Stem and slice the strawberries, place them in a bowl with the sugar and lemon juice, mix well. Let the berries macerate in the juices for an hour or so. Afterwards strain about 1/2 of the berries and set aside. Place the remaining berries and juices in a blender and puree until smooth.
Place remaining ingredients into a bowl and whisk together. Add the pureed berries to the cream mixture and blend until well combined. Once finished place the mixture into the refrigerator for 6-12 hours; this will help prevent crystallization of your ice cream in the freezer. When you are ready to make your ice cream turn on your machine and pour your finished cream mixture into the frozen bowl. Mix until thickened, about 20 minutes. Add the remaining strawberry slices you set aside and let the machine run for another 5 minutes. Once finished transfer to a freezer safe bowl and freeze for several hours or for a softer ice cream, serve immediately.
Place remaining ingredients into a bowl and whisk together. Add the pureed berries to the cream mixture and blend until well combined. Once finished place the mixture into the refrigerator for 6-12 hours; this will help prevent crystallization of your ice cream in the freezer. When you are ready to make your ice cream turn on your machine and pour your finished cream mixture into the frozen bowl. Mix until thickened, about 20 minutes. Add the remaining strawberry slices you set aside and let the machine run for another 5 minutes. Once finished transfer to a freezer safe bowl and freeze for several hours or for a softer ice cream, serve immediately.
- Mama Flava -
Thursday, June 12, 2008
Easy Weeknight Fish
Since tuna is out of the question as a dinner option in our house (too much mercury) and it looks increasingly like wild salmon (see article linked here) will be harder to acquire on a weekly basis, I have had to rethink my weeknight fish of choice for Baby Flava. Low mercury content fish like sole and tilapia have become good options for us and for the most part the price is right. The only downside is that these types of fish do not have as many Omega-3 fatty acids as other fattier fish do. So, it is important not to forgo salmon altogether! I suggest feeding your little one wild salmon as much as possible and otherwise increasing the amount of whitefish you prepare each week.
Yesterday I pulled some Trader Joes Dover Sole out of the freezer to defrost for dinner. These thin fillets make for a simple dinner because they cook fast. However a fish like sole needs a different kind of preparation than something like salmon. My favorite easy white fish fillet preparation is as follows. Baby Flava snarfs this fish so fast I can hardly keep track of how much she has eaten. Cut into bite size pieces for your toddler or mash up with a fork for your younger baby.
- Mama Flava -
Yesterday I pulled some Trader Joes Dover Sole out of the freezer to defrost for dinner. These thin fillets make for a simple dinner because they cook fast. However a fish like sole needs a different kind of preparation than something like salmon. My favorite easy white fish fillet preparation is as follows. Baby Flava snarfs this fish so fast I can hardly keep track of how much she has eaten. Cut into bite size pieces for your toddler or mash up with a fork for your younger baby.
Easy Weeknight Fish
Rinse fillets in the sink and pat off excess water leaving fish slightly damp. In a separate dish (a deep baking dish is best) place 1/3-1/2 cup of white whole wheat flour. Add a few pinches of salt, some ground pepper, garlic powder, cumin, and a pinch of chili powder to the flour. Mix until well combined. Heat a skillet to medium/high and place a few teaspoons of butter/smart balance in the pan. Once the butter is hot take each fish fillet and dredge it in the flour mixture. Make sure each fillet is covered completely and then shake off any excess flour. Place fillets in the pan and saute until golden brown then flip each fillet and cook until second side is golden.
I serve this fish as is to Baby Flava. For adults I like to add a simple brown butter sauce on top or (if I have a little more time) I deglaze the pan with white wine and create a simple sauce with garlic, butter, and spices.
I serve this fish as is to Baby Flava. For adults I like to add a simple brown butter sauce on top or (if I have a little more time) I deglaze the pan with white wine and create a simple sauce with garlic, butter, and spices.
- Mama Flava -
Thursday, June 5, 2008
Better Bran Muffins
This is a recipe I have been working on for quite some time. The ideal healthy bran muffin has always eluded me. For years I found recipes that were on one extreme or the other of the bran muffin spectrum. I tried muffins that were as sweet as cake and I made my fair share of bran muffins that tasted like plain bran cereal. Several months ago I decided to get back on the horse and try again to create a better bran muffin and at last I think I have done it!
To be truthful, I must admit that Baby Flava has loved every version of this muffin that I created, even those that I didn't think were quite right so experiment with your baby. Add different veggies to find the muffin that your little one likes best. For me, this muffin had the best all around flavor and a great serving of veggies for a breakfast food.
Better Bran Muffins
1 1/4 C Lowfat Buttermilk
1/4 C Blackstrap Molasses
3 T Canola Oil
2 Eggs
2T Brown Sugar
1 C Whole Wheat Flour
1 & 1/2 C Wheat Bran
1/2 C Oat Bran
1 tsp Baking Soda
1/2 tsp Salt
1/2 C Carrots (finely grated)
1/2 C Sweet Potato (cooked and mashed)
1/2 C Dried Cranberries (roughly chopped)
* These muffins are best kept in the fridge to stay fresh, they freeze well too.
** Grating the carrots very fine is worth the extra work, they add a lot to the texture of the muffin.
- Mama Flava -
To be truthful, I must admit that Baby Flava has loved every version of this muffin that I created, even those that I didn't think were quite right so experiment with your baby. Add different veggies to find the muffin that your little one likes best. For me, this muffin had the best all around flavor and a great serving of veggies for a breakfast food.
Better Bran Muffins
1 1/4 C Lowfat Buttermilk
1/4 C Blackstrap Molasses
3 T Canola Oil
2 Eggs
2T Brown Sugar
1 C Whole Wheat Flour
1 & 1/2 C Wheat Bran
1/2 C Oat Bran
1 tsp Baking Soda
1/2 tsp Salt
1/2 C Carrots (finely grated)
1/2 C Sweet Potato (cooked and mashed)
1/2 C Dried Cranberries (roughly chopped)
Pre-heat your oven to 400 degrees and spray a 12 cup muffin tin (unlined) with canola oil. Place the first five ingredients in a bowl and whisk until well combined. Add the dry ingredients to this mixture and stir until the batter comes together. Lastly, add the carrots, sweet potato, cranberries and mix. Scoop the batter into muffin tins until each cup is full. Bake for 15-20 minutes until done. Cool in the pan for 10 minutes and then remove to finish cooling on a wire rack.
* These muffins are best kept in the fridge to stay fresh, they freeze well too.
** Grating the carrots very fine is worth the extra work, they add a lot to the texture of the muffin.
- Mama Flava -
Tuesday, June 3, 2008
Is it really worth it to buy organic food?
Daddy Flava is here with what will hopefully be the first of many posts.
I consider myself thrifty about any type of purchase, particularly food. Mommy Flava will sometimes get frustrated with me when we shop together since I can spend an indefinite amount of time comparing products. Even when I think I prefer a food product that is more expensive I still like to back it up with a blind taste test (btw, you can taste the difference between clover and mesquite honey - who knew?).
On the other hand, I also firmly believe in an adage that my grandfather (great-grandpa flava?) told me to live by: never go cheap on your stomach. That philosophy has always seemed right to me, in particular if you also believe that "you are what you eat".
Now, with recent skyrocketing food prices, I have increasingly become torn on whether to spend money on organic foods. Is it really worth spending that extra money on the organic product? To put the dilemma another way: could I be spending (or saving) the extra money I spend on organic foods in another way that would better benefit my family?
Of course, there are no easy answers. In particular, there is no scientifically conclusive evidence that buying organic foods results in better health (or even taste). But I find it hard to ignore what seems to be an increasing amount of circumstantial evidence, like this article on Morning Edition.
There might not be anything wrong with non-organic food but I can't shake the feeling that it's probably worth it to spend the extra money to put a better product on our plates. I hope (and expect) that years from now we might even be able to say that spending money on organic foods is a good investment since it will result in better health and lower medical bills.
But who knows? In the mean time, I'll continue to comparison shop, lean towards buying organic food, and hope I'm not wasting my money. Then again, if I'm buying an organic tomato because it tastes better than a non-organic, at worst it's a tasty mistake.
Thursday, May 29, 2008
More on Wasted Food
 A week and a half ago there was a great article in The New York Times about wasted food. Finally, this issue seems to be getting the attention it deserves. The story notes that Americans (as a society) waste the equivalent of one pound of food per person every day. To make you feel even worse, the tons of food we send to landfills rots and then produces methane, aka a huge source of greenhouse gases. Yikes! This information certainly doesn't help to assuage my all-consuming thoughts about the convergence of skyrocketing grocery store bills, a pending global food shortage, and the toxicity of mass food production.
Mentioned in the article is a blog written by journalist Jonathan Bloom called, appropriately, Wasted Food. I really like this blog and would encourage you to check it out; in particular note the suggestions he makes in his recent post Pantry Patrol.
As a new mother these issues have a strong resonance with me especially as I begin to think about how to prepare Baby Flava to live in the world that will come. For now, where to begin? Well first, we are going to continue our campaign to be thoughtful grocery shoppers, we will continue our effort to minimize our food waste, we will begin to cut back on the amount of meat we consume, and now, I will take on the task of seriously reorganizing our pantry!
- Mama Flava -
**Note, the two trays of food in the image above sat outside during a summer event. A few people nibbled on a few pieces of fruit/veggies, all of the rest of the food was thrown away.
Wednesday, May 21, 2008
Quick Veggie Quesadillas
The saying that you never know when love will strike is true. My taste buds have had a passionate affair with the quesadilla that started in a food twilight zone known as the Astoria neighborhood in Queens, New York. Around the corner from my apartment was this little hole-in-the-wall Mexican restaurant. They served a black bean and cheese quesadilla (and not much else) that was something to fall in love with. When I moved back to the Upper West Side of Manhattan I found a local Tex-Mex haunt that served a mushroom and spinach quesadilla on a whole wheat tortilla that spoke to my evolving desire for healthier alternatives to my favorite foods. In the many years since I left New York I have been on a quest to make a quesadilla at home that would take my taste buds back to those passionate days in New York (I think I've stretched the love theme too far).
Here is my recipe for quick and healthy veggie quesadillas. We serve them with sour cream, guacamole, and salsa for the grown-ups - Daddy Flava likes his with a Negra Modelo. Baby Flava loves hers sans accoutrement. I love a quesadilla for Baby Flava because it is such a well rounded toddler meal (whole grains, dairy, two kinds of protein, and veggies) and it is also super tasty. Plus, BF can pick up the triangles and feed herself, which is always a plus in our house.
Quick Veggie Quesadillas
1 package of 100% whole wheat wraps/tortillas
1 cup shredded smoked Gouda
1 cup shredded Parrano
1 can of fat-free refried black beans (we like the Trader Joes brand)
Canola Oil (preferably in a spray can)
Pinch of salt
Veggies
- Sliced sautéed zucchini
- Sauteed spinach
- Sauteed mushrooms
- Mama Flava
Here is my recipe for quick and healthy veggie quesadillas. We serve them with sour cream, guacamole, and salsa for the grown-ups - Daddy Flava likes his with a Negra Modelo. Baby Flava loves hers sans accoutrement. I love a quesadilla for Baby Flava because it is such a well rounded toddler meal (whole grains, dairy, two kinds of protein, and veggies) and it is also super tasty. Plus, BF can pick up the triangles and feed herself, which is always a plus in our house.
Quick Veggie Quesadillas
1 package of 100% whole wheat wraps/tortillas
1 cup shredded smoked Gouda
1 cup shredded Parrano
1 can of fat-free refried black beans (we like the Trader Joes brand)
Canola Oil (preferably in a spray can)
Pinch of salt
Veggies
- Sliced sautéed zucchini
- Sauteed spinach
- Sauteed mushrooms
Pre-heat a large skillet on the stove, once warm spray lightly with Canola oil. Take one wrap/tortilla and spread a generous helping of beans on one half. Sprinkle 1/4 of the Gouda and 1/4 of the Parrano on top of the beans. Place a generous helping of your veggies of choice on top of the cheese. Fold the wrap/tortilla in half and place it in your hot skillet. Cook until the bottom is golden; then spray the top half of the quesadilla with canola oil and sprinkle with a pinch of salt before flipping over. Once both sides of the quesadilla are golden brown remove it from the pan, let cool for 2 minutes, and then cut into triangles. Repeat with the remaining 3 wraps/tortillas.
These are great hot off the skillet but leftovers also make a tasty snack cold.
- Mama Flava
Monday, May 19, 2008
The Price We Pay For Groceries
For the last few months I have been listening to and reading my fair share of doomsday reports about the state of the American economy. Every day there seems to be a new story about entire neighborhoods of foreclosed homes, predictions that the price of gas will reach $5 a gallon by the end of the year, and warnings that the looming food crisis will drive up the price of every basic food we consume. For a while my coping strategy was to embrace a state of numbness to this global conversation happening around me. Could things really be this bad? Well, I think they actually might be.
Yesterday I did two things that drove this looming crisis home for me. I stopped at a gas station and had to pay $43 to fill up my little Honda Civic. Afterwards, I drove to Whole Foods to pick up some meat for the week. I needed peppers and decided to grab them while I was there rather than making a second stop at Trader Joes. Three red peppers cost me over $7.50. For the first time since talk about a recession began I felt scared. What will $150 of groceries buy me in one year, will it be enough to feed a family of four for a week? More importantly, how will someone less fortunate than we are afford basics like milk and eggs when the prices skyrocket?
I don't mean to get all doom and gloom on this generally upbeat blog but I am eager to know what other moms think. Does anyone else feel like every week you go to the grocery store and come home with a higher bill and less food? Are you worried about the price you will pay for healthy groceries one year from now? Have you already made adjustments to your diet in order to compensate for the increased cost of basic food items?
- Mama Flava -
Tuesday, May 13, 2008
Salmon (the new tuna) Sandwich
First I want to wish all of our readers a belated Happy Mother's Day. I hope you each had the chance to relax and spend some quality time with your family. We celebrated mother's day with my in-laws in Virginia. It was rainy here on Sunday so we spent most of the day inside, eating. My father-in-law packed us a dogie bag to take home that included some lovely poached salmon, which he had ordered from Whole Foods.
Yesterday I opened the fridge to make Baby Flava's lunch and decided that the leftover salmon would make a great sandwich. I took out a piece of Ezekial bread (this is a new favorite product of ours) and cut it in half. In a small bowl I mashed a few oz's of the fish; ours was very moist so there was no need to add anything but you could add a little organic mayo to fish that is dry. After spreading the fish on half the bread I layered on a few slices of ripe avocado. Then I closed the sandwich and sliced it in half. As a side I washed a few blueberries, which thanks to Baby Flava's new molars, she enjoys tremendously. It was as healthy as a quick and easy toddler lunch can get!
My husband and I often talk about what a shame it is that canned tuna is so high in mercury. Recent studies say that a child can safely eat canned (chunk light) tuna only once every few weeks and some say that children under five should not consume tuna at all. Growing up we used to eat tuna four or five times a week. It is sadly ironic to me that eating canned tuna for lunch has become a real treat in our house. However, I don't think our kids need to miss out on tasty fish sandwiches. Once BF gets a little bit older I will start buying canned salmon and preparing it as I would a can of tuna. Salmon is canned with small bones that can be mashed up, so until she is a bit older we will only use leftover fresh salmon for her sandwiches. It is a very tasty alternative to tuna and the best part of serving salmon is that your little one enjoys all of the benefits of the fish's high levels of omega-3 fatty acids.
In my opinion, salmon is the new tuna!
- Mama Flava -
Thursday, May 1, 2008
Spanakopita
Spanakopita is one of my all time favorite foods. I love it anyway, anytime, which is why I was shocked by the realization that I had not yet made it for Baby Flava. Normally I prepare the dish in an 9x13 '' baking pan but for BF I thought spanakopita in it's appetizer form would be easier so that she could pick up the pieces with her hands. This recipe includes enough to make a full sized spanakopita for your family and plenty of pockets for your little one. Of course, the kiddos can also eat the regular version of this dish, especially if they are adept at using a spoon or fork. Baby Flava LOVED this dish and, as always, I felt great because she was eating so much spinach!
Spanakopita (adapted from Mollie Katzen's Moosewood Cookbook)
1 package of whole wheat filo dough
2 packages of frozen spinach (1lb each)
1 container of low fat cottage cheese (1lb)
1 cup of crumbled feta cheese
5 eggs
1 tsp basil
1 tsp salt
1 tsp oregano
1 tsp pepper
2 T flour
1 onion
1 T canola oil
3/4 cup Organic Earth Balance
The night before making this dish take the filo dough out of the freezer and put it into the fridge. One hour before preparing the dish place the filo on your counter so that it can come to room temperature. Preheat your over to 375 degrees. Defrost the spinach completely and place it in a colander to drain. (You can squeeze the excess water out of the spinach to speed up the process.) While the spinach is draining, dice the onion and saute it in the canola oil until lightly browned. Combine the spinach, onion, cheeses, spices, eggs, and flour in a bowl and mix well. Separate one cup of the mixture and set aside.
Open the filo dough, spread it out on a clean counter and cover with a damp washcloth. Melt the Earth Balance (EB). To begin assembling the spanakopita brush the bottom of a 9x13" baking dish with EB, place one filo sheet in the pan and brush it generously with EB. Continue the process of placing a sheet and brushing it with EB until you have 7 sheets stacked in the bottom of the dish (the sheets will hang over the edge.) Place 1/2 of the spinach filling on top of the filo and then start the process of layers sheets again until you have another 6 stacked. Place the remaining spinach mixture on top of the filo and then stack another 7 sheets. Fold the excess filo in along the edges being sure to make tight corners. Brush the top of the dish generously with the remaining EB. Place the finished dish in the oven for 45 minutes (uncovered) until the top is flaky and brown.
With the remaining spinach mixture and 4 filo sheets you will make a few pockets for your little one. Take one filo sheet and place it on your counter, brush with Earth Balance and then place one other filo sheet on top. Cut the sheets into three long strips. Place a spoonful of the spinach mixture in the lower corner of one strip and fold up into small triangles adding a brush of butter in between each fold. Repeat on each strip and then again with the remaining two pieces of filo dough. Bake on a greased cookie sheet in the 375 degree oven for 15 minutes. (My folding technique is not impressive but remember that your little one doesn't care how pretty the folds are, just that the dish is tasty!)
- Mama Flava -
Sunday, April 20, 2008
Passover Challenges
Before I begin this post I must apologize for the brief lull in blog entries. Both Grammie Flava and I have be preoccupied by Passover. However, the holiday ends today and we are eager to get back to our regular posting schedule.
Any event or trip, which requires a limitation in the food you have available to feed your baby/toddler can be a real challenge for a mom. Baby Flava is 15 months old so this is the first year we have had to face the question of what to feed her during the 8 days of Passover. Passover is the Jewish holiday which commemorates our people's Exodus from slavery in Egypt. During the duration of the holiday, Jewish people are forbidden from eating foods that are considered hametz (leavened). Hametz includes all bread products and anything that includes the grains wheat, rye, barley, oats, and spelt. In addition, Ashkenazi Jews (Jews of Central and Eastern European descent) do not consume any corn or legumes during this period.
At first I wasn't even sure were to begin planning for Baby Flava's Passover. How was Baby Flava going to get any grains during these eight days? I was pretty confident that matzah (the flat cracker which is the only "bread" we are allowed to eat) was not going to go over well. There are a slew of companies who produce boxed cake and pancake, etc. mixes that are Kosher for Passover (KfP) but most are loaded with sugar and none have any whole grains. So the first thing I realized was that something was going to have to give. BF was going to have to give up whole grains for the week. We purchased a box of KfP muffin mix, and they became a staple of her diet.
The next major decision we made about BF's Passover diet was that she was going to be Sephardi (Jews of Spanish, Arabic, or Persian decent) for the week. Allowing her to eat legumes was a big help because we were able to give her peas (an absolute favorite) and beans (like our Black Bean Patties). In addition to these two major decisions, we stuck to other traditional Passover fare to round out her diet. This week she enjoyed lots of potatoes, yams, brisket, gefilte fish (which was a huge hit), matzo balls, chicken and asparagus.
Although getting through the week was undoubtedly a challenge, preparation was the key. By making some decisions in advance that allowed us to prepare for what we could feed BF we saved ourselves a lot of aggravation and potential temper-tantrums along the way.
- Mama Flava
Thursday, April 17, 2008
A Plethora of Produce-Organic or Conventional--Either, just make sure you wash it!!

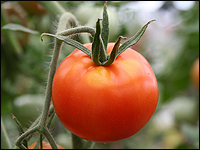
Spring, my favorite time of year. The birds are singing their hearts out, the tips of the trees are sprouting wonderful shades of green, tulips, daffodils, crocus, all popping out of the ground bursting with color...and the coming of wonderful produce in the stores and farmers markets. Soon we'll have gorgeous greens, stone fruits, berries, fresh zukes and cukes...and tomatoes that actually taste like tomatoes.
This is the time of year to take advantage and introduce babies/toddlers to the wonderful bounty. The question many ask, organic or conventional-- does it really make a difference? We in the Flava Family lean towards organic for as much as we can. It's more expensive, but we feel it's a bit better for us and the environment to use organic when possible. However, whether you use organic or conventional...make sure you wash it!!
Organic vs. Conventional is a hotly contended issue with pros and cons: Is it better for the environment? No toxic chemicals or pesticides on the food; no toxic run off into our water BUT some of the natural or organic pesticides are toxic to humans and wildlife.
Is Organic food healthier than conventionally grown food? That too is contested...many studies show there is no difference, but go to Organicconsumers.org
and according to their studies Vitamin C, nitrates and protein are higher in organic products.
Go to the National Library of Medicine PubMED from the NIH and they find no difference in one article and then in another...
Organic fruits and vegetables can be expected to contain fewer agrochemical residues than conventionally grown alternatives. There is a widespread belief that organic agriculture products are safer and healthier than conventional foods. It is difficult to come to conclusions, but what should be made clear to the consumer is that "organic" does not automatically equal "safe". In the absence of adequate comparative data, additional studies in this area of research are required.
SO, what to do??? Here is a simple rule of thumb: if you eat the skin of the produce go organic--grapes, apples, peaches, berries etc. If you peel the skin off to eat it then go conventional--bananas, melons, oranges etc. Is this the right way to go... who knows. We all need to do the best we can within the confines of our time, budget and lifestyles.
If you can do all organic, great go for it. Try Trader Joes if you have one...ours is carrying lots of organic produce cheaper than any place else.
The one thing I do to ALL produce, if it is conventional or organic, I WASH IT. When I do my cooking demos I use a lemon as a simple example. I tell people I scrub lemons before I cut them--they usually laugh...think about it. How many lemons do you pick up before you decide on one? How many others have picked through the pile just like you do? How many times have you dropped a piece of produce and placed it back up on the pile.
Think of the people who unpacked the box of lemons placing them one by one on the pile. Your cashier picks it up...as does the bagger. The number of hands that touch your produce before you bring it home is astounding. So whatever it is, wash it-I use a soft scrub brush and lather it up using dish soap. My Dietitian friend is appalled at that...what if some soap is left on it, you can get sick. The soap is the least of my concerns.
Think about it the next time a waitress says...would you like lemon in your water?!
Wednesday, April 9, 2008
See Kai Run--shoes for toddlers

BF needed new shoes. She's grown out of the soft sole kind and needed something with a more sturdy yet flexible sole. Of course we could have taken her to this great "Littles" store we have in Pittsburgh but MF and I like to shop together, and since we live apart...we do it on line.
Our first thought was Merrells and then Keens. Looking at the REI website we found a pair of cute Keens that looked just like the adult kind so we ordered them. Not sure if this would be a good choice I did more searching. I ended up on some site and I honestly don't remember how I got there. Click here, click there etc.
There was a blog about shoes for toddlers and one comment was, "WTF, my daughter is three years old and they are showing heels for her. What happened to those adorable little kids shoes with a rounded toe..." and on and on it went. I read the responses many whole heartedly agreeing with her comments. Then there was one person who talked about this shoe --See Kai Run-- leather and flexible. Never heard of it.
So what does any tech savvy Grammie do...a Google search. There it was See Kai Run. The most adorable kids shoes round toes, sandals, booties, in soft lined leather with a firm yet flexible sole. I could have bought BF half a dozen pairs, but used restraint and ordered two. I figured MF can see what fits best and send back what she doesn't like/need.
There are stores that carry these shoes according to the See Kai Run website in both Baltimore (Bratt Decor)and Pittsburgh (Ona Boutique in the South Hills-no website found). I could not find any shoes on the Bratt Decor website and for me...ordering on line is much easier than going down to the South Hills.
MF received the two pair and LOVED them (I purchased a purple sandal and an outrageous orange sandal!!). BF put them on and was up and away immediately. What a great find. If you folks have other great finds, let us know, we want to spread the word about See Kai Run and other exciting finds!
Now I can't wait to help buy her fall shoes and winter bootie!
Monday, April 7, 2008
Calcium for Baby and Toddler
 Calcium is the most abundant mineral found in our bodies. It is essential for all living things, in particular for your growing baby/toddler. Your little one needs calcium to help grow healthy bones and teeth and for good general health. Suggested daily intake of calcium for the average toddler can range from 500 to 1,000 mg a day. This means that even though they drink almost a gallon of milk a week, we still need to find other ways to add calcium to their diets.
Dairy products are the most conspicuous high-calcium foods. Yogurt, milk, soft and hard cheeses are easy to add to any diet. Prepare a grilled cheese sandwich (on whole grain bread) for lunch. Throw a yogurt or cheese stick in your diaper bag to serve an an afternoon snack. Add cheese to a scrambled egg or mix cottage cheese with some peas and banans for lunch. Most of this is pretty intuitive for a mom.
The greater challenge is to find non-dairy alternatives that are high in calcium. Here are some foods that you may be surprised to learn contain calcium: blackstrap molasses, tahini (sesame seeds), broccoli, oranges, beans, figs, seewead, and sardines. Instead of a grilled cheese sandwich for lunch how about a hummus (made from chickpeas and tahini) and roasted red pepper sandwich. Cut up an orange for an afternoon snack or try one of Baby Flava's favorites; figs with (or without) parrano cheese. If you are brave, try sardines on toast. On the other end of the spectrum, molasses is an ingredient in many sweet treats like spice cookies, muffins, and banana bread. For a special occasion make your little one some ginger snaps. This short list of high-calcium foods offer the opportunity to get creative and of course add nice variety (another essential ingredient) to your child's diet.
One other important note, as many of you know Vitamin D is essential in aiding in the body's absorption of calcium. Taking your toddler out into the sun for fifteen to thirty minutes a day will allow them to soak up their Vitamin D from the sun and is a great way to get out some of their excess energy.
- Mama Flava -
Sunday, April 6, 2008
Mmmmm Omelets with Gribits
I have never been a fan of omelets when I go out to eat. Never enough "stuff" inside. I like a little egg and a LOT of filling in my omelets. If I am going to eat eggs, I'd rather just eat eggs; I like them over easy with a piece of toast to dunk in the yolk. An omelet to me is the filling, the egg is just the vehicle for the filling. Crazy huh!
Recently on my never ending quest to be healthy, I needed to decrease my fat intake. When you think eggs, the fat is in the yolk, that means no yolk. An eggwhite omelet...eeewwwww. Popop Flava eats eggwhite omelets plain for breakfast with nothing else. No thank you, not worth eating.
But, I needed protein and Go Lean "Sticks and Twigs" Cereal is OK some mornings, but others I need something more substantial, like an omelet.
OK, lets see what I have in my frig: leftover mushrooms, a half an onion, some roasted red peppers, a small piece of sauteed chicken from dinner last night, some cooked broccoli and I always have cheese.
I took out all these leftovers and chopped them up and sauteed the onions and mushrooms in olive oil until golden brown. Then I added the rest of the ingredients and sauteed them to heat through. This mixture I call "gribits". I had about 2 cups of "gribits" (grilled bits!) which was way to much for an omelet just for me, but I could use it for the next few days.
I opened a can of black beans, drained and rinsed them and threw a few in for good measure. I left about 1/2 cup of the gribits in my pan and added egg whites--probably the equivalent of 2 eggs and set the flame on low and covered it. While it was cooking I sliced some Manchego cheese (about 1/2 ounce). If I am going to have fat, I'd rather have in in a little cheese than the egg yolk.
I uncoverd the omelet and fliped it, added the cheese and covered for another couple of minutes until the cheese melted. Fold it in half, slide it on to the plate and YUMMMM!
I didn't need to use salt or pepper and it was tasty, tasty, tasty.
BF came a few days later and I made her an omelet using the pre-made gribits and I used two whole eggs. She almost ate the whole thing.
I made this omelet on a Cooking Segement for KDKA's Morning Show on what to do with leftover Easter ham. Instead of the chicken in my gribits I added the ham. I also made a grilled pizza on the show and added the gribits on top of the pizza. What a hit!
A great way to utilize leftovers in your frig for a healthy, delicious AND nutritious meal. You can tailor this to your family's like, your child and your leftovers. Chop the gribits fine if your baby isn't into the larger bites, and the adults will love the flavor no matter what the size of the gribits.
Monday, March 31, 2008
Black Bean Patties--or--Bitty Bean Burger

I started to write a post on fish this morning but became side tracked.
Watching the KDKA morning show while writing, a friend of mine was on showing how to eat healthy on a budget. She represents Weight Watchers and I've known her for 7 years and never knew she could cook!! She made some wonderful Black Bean Patties and I immediately thought of BF. She loves black beans and this would make a quick, inexpensive little "bitty bean burger" for her.
This is definitely one of those family meals that everyone can enjoy. You may serve this on a bed of lettuce or on a bun, or in a pita. Add some sour cream or Titziki sauce, or hot sauce. Great dinner or brown bag lunch.
Here is the simple recipe:
Bitty Bean Burger
1 1/2 cans black beans drained rinsed and slightly mashed
2/3 cup of corn
1/4 cup corn meal
1 tsp cumin
1/4 tsp chili powder (mild)
1 tsp salt
1/2 tsp pepper
2 egg whites
1/4 cup chopped cilantro
1T safflower or olive oil
Mix all together and form into golf ball size balls. Flatten and saute in hot oil, 4 minutes on each side or until heated through.
For BF make 8 walnut size balls and saute. Place in mini pita pocket and top with a dollop of sour cream. YUM!
Next post I'll share my Black Bean Goody Omelete that BF, MF and DF snarfed down last time they came to visit.
Sunday, March 30, 2008
Karp's Happiest Toddler on the Block
 Among those of us who write and read this blog I am sure there are an array of opinions about Dr. Harvey Karp's theories on child development. In our house, we are fans of his work. My husband and I had not been home from the hospital with Baby Flava for more than two days before we ran out to purchase The Happiest Baby on the Block. The techniques he suggested in this book worked like a charm for BF, thank goodness because we were exhausted and feeling like we were in over our heads. Several months (and a whole world) later, BF started showing signs of impending toddlerhood so we rushed out to buy the next book in Karp's series, The Happiest Toddler on the Block.
Karp's thesis in The Happiest Toddler is that toddlers are much like our prehistoric ancestors; distractible, emotional, and inarticulate cavemen. In order to be able to sooth the savage toddler beast when he/she arises, Karp outlines a series of techniques including the use of your toddler's own primitive language, which he refers to as toddler-ese. Since BF is still in the early stages of her life as a toddler, the jury is out in regards to our opinion on The Happiest Toddler but to say the least, it was a fascinating read.
As it relates more specifically to this blog, Karp wrote a piece in his book on feeding toddlers. He explains why toddlerhood is a time when many children become picky eaters and emphasizes the importance of making sure your child gets enough of certain key nutrients including calcium and iron. I thought this was a topic worth exploring further so, keep an eye out for two future blog posts dedicated to increasing the amount of calcium and iron in your toddler's diet. In the meantime, I am eager to know what other mom's think about Karp's research.
- Mama Flava -
Wednesday, March 26, 2008
Stage 1 Foods-how to cook, prep and keep
MF outlined how to start babies out on Table Food. Lets look back at some of the stage one purees we made, how we made them and how we kept them.
Techniques here are quite simple and straightforward. Use those fruits and veggies that are mild in flavor and pose no possible allergic reactions. Your pediatrician will give you a list of the "first foods". By mild in flavor, we mean no cabbage, broccolli or cauliflower in the beginning; start with peas, sweet potatoes, carrots, etc.
Cooking veggies for baby should be the same as you cook them for yourself--don't overcook, don't cook in a huge quantity of water, this leeches out the nutrients and don't load them up with butter. Steamed veggies are the healthiest and easiest. You can do this in a pot or in the microwave.
Sweet potatoes can be baked in the oven or microwave. I baked 4 sweet potatoes the other night and forgot to put a tray or aluminum foil under them in the oven. As they bake, they will weep out sweet sugary "juice", and I ended up with burnt mounds of sweet potato in the bottom of the oven. So do be careful. I tend to grab the potatoes out of the oven...a good squeeze lets you know the potato is done. However, the sweet potato syrup is hot and it is sugary and will burn, so use an oven mit or towel.
Sweet potatoes really need very little processing after that. Mash them up and fill ice cube trays with the mash; place in freezer; when frozen, pop the cubes out into a labeled zip lock bag. Label it with the date and what it is. I found those vaccum seal bags are terrific. Removing the air not only perserves what it is you are freezing, prevents ice crystals and freezer burn, but it also saves space in the freezer. The bags can be resealed once opened and can be washed and reused.
When you want sweet potato, take out 1 or 2 cubes and microwave for 20-30 seconds depending on your microwave. Voila, fresh mashed sweet potatoes.
This is your basic method for stage 1, steam, mash and freeze. Carrots should be cut into chunks, steamed then pureed in the food processor. If you need a little liquid, take some of the steaming liquid. Peas the same, steam, process and freeze.
Red peppers can be roasted in the oven at 350 degrees until black. Remove the skins, seeds and stem, puree and freeze.
Fresh string beans, being stringy, do not puree quite so easily unless they are overcooked to mush. But a little perserverance, some liquid from the steamer and those too will work.
Fruits, apples, pears, peaches, plums, cherries etc...peel, de seed, cook, mash, puree and freeze. As you go along you can start combining veggies, fruits etc. I made Parsnicarapple...mashed parsnips, carrots and apples. Spinach and pears, Peas and carrots, the combinations are endless.
You are making your own Happy Baby cubes, a little less expensive and more variety.
MF started adding some spices to the veggies, BF like cumin!! So if your meals include Indian flavors, Italian flavors...whatever, go ahead, a little at a time. Of course double check with your pediatrician!
Thursday, March 20, 2008
Starting Baby on Table Food
 Recently I was chatting with a friend who told me about a mom in her playgroup who is stumped by how to start her daughter on table food. Some moms, especially those who cook, take for granted their instinctual food knowledge, which makes it a lot easier to tackle feeding a baby for the first time. However, the majority of moms out there find themselves traveling up a steep learning curve once their babies begin to eat solid foods. What can they "chew," what are their nutritional needs, what happens if they choke on something, what kinds of food will they like, what foods are off limits? Once a mom is able to answer all of these questions, then she needs to learn how to actually prepare the healthy food her baby likes. There is really a tremendous amount to learn, no wonder my friend's friend was feeling daunted!
So much of what I know now I learned from talking to other moms, reading books or from trial and error experimentation. I hope this blog in it's entirety reflects what I have learned and can therefore be a resource for all moms who want to feed their babies nutritious and tasty meals. But in addition, here is a little crib sheet on getting started with table food.
1) Start slow and simple. For baby's debut don't prepare your favorite meal, which requires that you slave in the kitchen for three hours. Even if baby loves the food you will be left thinking "How on earth can I keep this up?" Try things that don't require hours of prep and clean-up.
2) Variety, variety, variety! Studies have shown that food pickyness is actually about 80% genetic. If you are a picky eater there is a very high probability that your baby will be a picky eater too. However, this does not mean that you should forgo exposing your baby to as many flavors and textures as possible at a young age. Grow their palate and teach them to explore new flavors; you never know what foods will be a hit.
3) Repetition. Even if your baby rejects a food keep trying, it make take upwards of 10 times before your child actually acquires a taste for a new food.
4) Spice things up! Spices are a wonderful tool in the kitchen. Don't be afraid to season your spinach with cumin, your salmon with curry or your squash with sage. We like exciting flavors in our food and so do our kids!
5) Sometimes baby is just not hungry. Sometimes kids are not hungry for a variety of different reasons. Maybe they are tired, ate too much earlier, or they are just more interested in reading a book than eating. Don't get discouraged and follow their lead. If they don't want to eat then put their food back in the fridge and try it again the next day.
6) Get to know your baby. You will get lots of advice from other moms but the most important thing is to know your baby. What kinds of foods can she/he manage? Can she gum up halves of grapes or it is too early for her? Does he choke on pieces of chicken but have no problem with fish? Just remember that your baby will evolve so even if something is too difficult for her now, it may not be in another month.
7) Great first table foods for baby: Anything you eat that is soft enough for your baby to gum up! Try broken up meatballs, cut up avocado, diced fruit (bananas, grapes, etc), small pieces of whole wheat bread with hummus, hard boiled egg yolk, mashed sweet potatoes, whole wheat crackers that dissolve in the mouth, ricotta gnocchi, flaked pieces of white fish, pureed veggies with lentils added. Look through the archives of this blog for tons of other great recipes and ideas. Have fun and enjoy this special time with your baby!
Tuesday, March 18, 2008
Quick Eggs for Baby or Toddler
I love learning new time saving tricks for making quick baby/toddler food and this is a new one that I have to pass along: microwave eggs!
Eggs are a great source of protein and several other essential nutrients (like folate, iron, zinc) that are good for a child's brain development. Although a few servings of egg a week are enough for your growing baby, scrambling an egg in the morning can sometimes be too much work for a harried mom. So, here is a great alternative -- take a small microwave safe ceramic bowl and spray lightly with canola oil. Crack one egg into the bowl and add any accoutrement that your baby enjoys like cheese or veggies. Beat the egg and accoutrement in the bowl until well combined and then microwave on high for 60 seconds. The microwaved version of a scrambled egg turns out fluffy and relativity moist. This is a great healthy and fast breakfast for the busy mom to serve her baby.
Last night I made spinach for baby flava's dinner (I sautéed spinach in a small pan with water, garlic, and cumin until cooked and then chopped into finger sized bites) and had plenty left over. So, this morning I mixed a few tablespoons of the spinach in with her microwave egg. The eggs were a big hit and I was thrilled because we squeezed in another serving of vegetables for the day.
I am sure there are other great microwave tricks out there so if you know of any, please share them in a comment.
Sunday, March 16, 2008
Rao's Pasta Sauce is the BEST!
I use tomato sauce in many things, as I am sure do many. When I have time I will open a can of Muir Glen diced tomatoes and add sauteed onions, garlic, fresh spices and let it cook for a while. At the end of the summer I will occasionally make a batch of fresh tomato sauce, but the quick saute kind not the "cooking for hours" kind.
Jarred tomato sauce is a quick easy meal and I use the Muir Glen in soups, brisket, chili's, sauces etc. I like the taste of the Muir Glen, the fact it is organic, and the price. I've tried many sauces and felt comfortable with Muir Glen.
Until 2 years ago I would NEVER have purchased RAO's pasta sauce because it is $9 a bottle. Who in their right mind would pay that much for pasta sauce.
Then I had the opportunity to work with the Marketing Executive from RAO's at a demo. This was the first time I tasted any of their products; sauces, pastas and dressings.
They were DELICIOUS! Not only did I have a blast with the Exec. from Rao's I couldn't get over the fresh taste the color and raved the whole time we worked together. My husband also loved their products, so much so, on our first trip ever to Las Vegas we had dinner one night at their restaurant. Yummmmmm! The story of RAO's is fascinating, take a look if you have time.
My favorite sauce, their Vodka Sauce. I keep at least one jar on the shelf at all times and I buy extra whenever I see it on sale. I still use Muir Glen canned tomatoes, but for Popopflava and myself for dinner, or for a meal with Baby Flava and family, it's well worth the price.
There is no recipe...cook up your favorite pasta (RAO's pasta is also outstanding!), heat up the Vodka Sauce, pour on pasta, sprinkle with fresh grated parmesano reggiano, a fresh steamed veggie on the side...heaven.
And BTW, Good Housekeeping just did a taste test of all pasta sauces, you'll never guess who won...RAO's! Try it, you won't regret it!!!
Tuesday, March 11, 2008
French Brioche
 Here in Baltimore there is a hint of spring in the air. We had a few days this month that crept towards 60 degrees, the birds are chirping again and the crocus' are beginning to pop out of the ground. Thank goodness! Although this means that we will not likely have anymore snow days, it doesn't mean I have given up on bread baking for the year.
Last weekend, I felt inspired to bake a few loaves but I wanted to make something that felt, well, springy. The first thing that came to mind was brioche. The recipe I use came from a beloved French tutor (Madame Angen) who taught my brother and I French in anticipation of our family's year-long sabbatical to Switzerland in 1987. This sweet French bread has been a favorite of our family's ever since. BF tried it for the first time on Sunday and loved it! We enjoy our brioche for breakfast toasted with some butter. However Baby Flava enjoyed hers as a sandwich with hummus and spinach. The sweet and savory flavors together were really tasty. As you can imagine, brioche also makes amazing French toast.
Mme Angen, if you are out there, thank you for this wonderful recipe.
French Brioche
3 packets of dry yeast
1/2 cup warm water
1/2 tsp sugar
Add 1 1/2 cups warm water
1 cup sugar
1/2 cup canola oil
1/2 tsp salt
1 tsp vanilla
4 eggs
1 1/2 cups chopped yellow raisins
7 cups flour
Pre-heat oven to 375 degrees. Combine the water, yeast and sugar. Add mixture and the rest of the water, sugar, oil, salt, vanilla, and eggs into a mixer and combine. Add 1/2 of the flour, mix, and then add the chopped raisins. Add the remaining flour slowly until the dough is smooth. Knead for 5 minutes (this is a slightly sticky dough). Put the dough in a greased bowl and rise until doubled. Punch dough down and rise again until doubled. Form dough into 4 round loaves and place on greased cookie sheets. Cut two slits on the top of each loaf and rise again until doubled. Bake loaves for 15 minutes, remove them from the oven and brush with beaten egg yolk mixed with 1T milk, return the loaves to the oven for another 10-15 minutes until nicely browned.
Sunday, March 9, 2008
Chicken/Bison Chili-for baby!
I gave MF many flavors when she was growing up, but chili was not one of them.
I was not a chili fan until older, but now can't get enough of it! When BF came along I thought...Chili--for baby??? Not until she's older...girl was I wrong!
I agree with MF re going out versus staying in. My chili is awesome while most I eat out is just OK. We have a delightful little bistro around the corner, our favorite neighborhood hangout. They have great Belgian beers on tap, mussels, Belgian fries; and what brings us back time and again is their consistency. Their food is consistently good, well made and tasty. But they have yet to have chili on the menu, but my guess is I will still like my chili better!
I started making chili with the standard; beef, chili powder, tomato sauce and kidney beans. While working as a demo chef I decided to try it with ground turkey and ground chicken and white cannelli beans and or pinto beans. I still add chili powder, but also add a Thai Chili Roasted Garlic Dipping Sauce by Wild Thymes--this brings the chili to another level. Recently I didn't have enough ground chicken in the freezer so I made Chicken/Bison Chili. We gave some to Baby Flava mixed with some butternut squash. Yummmie...She ate the whole thing!
I don't make "burn your tastebuds" chili. I add just enough to give you a bit of heat with a burst of flavor. I've served this chili at dinner parties for 70 with homemade cornbread and they ALWAYS come back for seconds.
Remember this is to your taste. I use hot chili powder from Penzeys and the Wild Thymes chili sauce. For those of you who like HOT, Wild Thymes makes a Morrocan Sauce...way HOT.
Chicken Bison Chili
Serves: 8-10 Cooking time: 1 1/2 hours Prep time: 30 minutes
2 T Extra Virgin Olive Oil
1 large onion small dice
1 lb ground Chicken (I use white meat ground chicken or turkey)
1 lb ground Bison
fresh ground pepper and salt to taste
1 28 oz can Muir Glen fire roasted diced tomatoes
1 14 oz can Muir Glen tomato sauce (add in if you need more liquid-you can also use wine!)
2-3 cans Cannelli beans (liquid and all) if you like a more meat chili add 2, more beans 3
1-3 T chili powder- I use 1 heaping T of hot
3 T Wild Thymes Roasted Garlic Thai Chili Sauce
2 cups frozen corn
optional: 1 cup chopped mushrooms, 1 cup chopped black olives, 1 cup chopped red pepper, 6 cloves smashed garlic
sour cream and grated cheese for topping
In large sauce pot on medium high saute onions in olive oil until translucent (if you are using garlic, peppers and/or mushrooms add now and saute until mushrooms lose their liquid)
Add meat and saute until done.
Add diced tomatoes, tomato sauce, beans and spices. Bring to low boil and turn down to simmer for 45 minutes. Taste for seasonings. You may add more chili powder, chili sauce etc to taste. Add corn and cook another 30 minutes until thick and bubbly.
Serve on homemade cornbread with sour cream and cheese on the side.
Chili tastes even better the second day and freezes perfectly. I had it for breakfast one day this week-breakfast of champions!
Thursday, March 6, 2008
An Acquired Taste
Five years ago, when I was living on the Upper West Side of Manhattan, I would have had a hard time trying to decide which type of meal I enjoyed more, one I made at home or one I ordered in a restaurant. Granted I was living in an incredible food city and even a mediocre meal in NYC far exceeds the best meal out in other locations. But I must say that in recent years, I have acquired a real taste for my own cooking.
Perhaps this acquired taste is a survival instinct. We are on a tight budget and eating out/ordering in are not good options for us these days. However, I am going to choose to think that I have become a better cook over the years and really know how to make meals that my family and I love. I cannot count the number of times we have eaten out in recent months just to conclude that our version of (fill in the name of a food here) is much tastier, healthier, and cheaper to make than the one we just ate.
These days you can't browse the internet, the food section of a newspaper, or the cooking aisle of your bookstore without seeing information about food movements: slow food, local food, there is even a new Jewish Food Movement. Maybe I should start a new "acquired taste" food movement ... it would be focused on learning to cook the foods you like really well rather than relying on others to cook them for you. Food for thought I guess.
Saturday, February 23, 2008
Homemade Healthy Soft Pretzles
 When I was growing up a winter snow storm always meant that it was time to bake bread. Grammie Flava's mother started this tradition and my brother and I always looked forward to the activity when we had a snow day. Here in Maryland snow never really seems to accumulate but a light dusting (or a threat of ice) is cause for school to be closed. So, yesterday, when that exact scenario occurred, I figured it was time to bake. Unfortunately, the day got away from us and by 4pm we hadn't started any bread so I decided to make a yeasty treat that was as fast as a batch of cookies -- soft pretzels. This is a recipe that is incredibly simple and a fun treat for everyone (and much healthier that Auntie Anns). Homemade pretzels are also a great food to bring to a party that will have a lot of kids!
Soft Pretzels
1 packet of yeast
1 1/2 cup of warm water
1 T sugar
2 tsp salt
2 cups regular white flour
2 cups white whole wheat flour (this is a great product for baking, it is much milder than regular whole wheat flour but it is still packed will all the same fiber and nutrition)
Toppings
1 egg
sugar and cinnamon
salt, poppy seeds, and garlic powder
Pre-heat oven to 400 degrees. Combine the yeast water and sugar. Add the white flour, salt, and whole wheat flour and mix until just combined. Dump dough out onto a floured surface and knead until soft. Cut the dough into golf ball sized pieces, roll into rope and twist into pretzel shape. Place pretzels on a cookie sheet, brush with a beaten egg and sprinkle with your favorite toppings. Bake for 10-12 minutes until done. The pretzels are best fresh!
Wednesday, February 20, 2008
Do You Hate Wasting Food?
My husband and I often debate about whether or not to throw away food we discover in the back of the fridge that is slightly past it's prime. You know what I am talking about: small chunks of cheese, half a bunch of soft cilantro, zucchini that has turned slimy, one portion of scrambled eggs from last week, or pita that is hard as a rock. Certain items inevitably need to go right into the trash (i.e. slimy zucchini) but others are a valid subject for debate (i.e. small chunks of cheese or hard pita.) Much to my husband's chagrin, I would often emerge victorious from these spirited tete-a-tetes and end up tossing everything in the trash.
These days, on a tight budget and feeling conscious of our carbon footprint, we have made a large effort to cut down on our food waste. Each week I prepare a grocery list which is comprised of the items I will need to prepare each meal for the week. This includes breakfasts, lunches for Daddy Flava to take to work, food for BF, and approximately 5 dinners per week. For the other two dinners we usually do leftovers or something from the freezer. It has amazed me what this small effort has done to cut down on the amount of food we waste. I bring into the house only the things I intend to cook or prepare for that week rather than taking the approach of "let's go to the market to see what looks inspiring". Worst case scenario is that I end up needing something that I don't have in the fridge and we need to make an extra trip to the store.
Although preparation has drastically cut down on our food waste we are still inevitably faced with hard pieces of bread, small chunks of cheese, a stray leek or half an avocado that could be tossed in the trash. This is where it is fun to get creative! Left over whole wheat tortillas from turkey wraps become cheese and black bean quesedias. Some hard crusty bread that is too difficult to eat turns into bread pudding. Of course, we all know that a veggie box full of stray carrots, onions, and potatoes will make a great base for a soup. If you are willing to do a little extra work, there are a plethora of tasty things to do with leftover food items.
If you still need to be inspired and want to learn more about why cutting down on food waste is an important environmental issue check out this great website LOVE FOOD, hate waste. They are based in the UK but have tons of useful information about food storage, portioning, and some hard facts about the impact of food waste.
- Mama Flava
- Mama Flava
Monday, February 18, 2008
Would You Eat That?
While getting dressed this morning I saw a TV ad for Pasta Pickups. It's a small plastic container with mini ravioli for toddlers. I immediately thought: I wouldn't eat that. A quick call to Mama Flava and she tried them and Baby Flava ate them. MF said they were not great and the cost is, well frankly, ridiculous...even for the convenience. The question I have: would you eat that?
I don't buy frozen dinners, pasta in a can, soup in a cup or hundreds of the other options sitting on the shelf calling out: we're delicious, quick, easy, convenient...prepared foods.
I did purchase Amy's Organic pocket thingies as a sample to see if I could replicate them. Except for the first few I took out of the box to test and replicate...they remain in the freezer untouched.
When I am looking for a snack, I go to the freezer and look at the Amy's box and think...do I want to eat that? And the answer is no. I'd rather eat an apple, a handful of nuts or some dried fruit. They just are not good enough to bother eating.... so why would I...or if you feel the same way...why would you eat that, and then feed it to your kids?
When we are thinking food for our children and grandchildren there are many factors: ingredients, nutrition, FLAVOR, likes/dislikes, time and cost. Whether you work in the home or out of the home time is precious but so are all the rest. Baby Flava is all about those factors and expanding the palates of our kids.
If traveling these Pick-ups are shelf stable, supposedly have good ingredients, are nutritious and really convenient...you can eat them at room temperature...Yuk!
Would you open one and eat it for yourself? If you can answer yes to that question...have at it.
Alternatives...traveling without a cooler...cut up apples or pears yes they turn brown but they still taste good; Trader Joes sells these great freeze dried fruit pieces in mango, pineapple and they melt in your mouth; cut up dried fruit; cut up cheese; good old peanut butter and jelly made on whole wheat bread, with natural peanut butter and no added sugar jams and jellies. Of course if you have a small cooler bag...the possibilities are then endless.
And the pasta pickups:
1 bag or box of mini ravioli
1/2 cup broccoli florets cut into bite size pieces and steamed for 1 minute
Or
1/2 cup greens beans cut into bite size pieces and steamed for 1 minute
Or
1/2 cup zucchini sticks steamed for 1/2 minute
1/2 cup organic vegetable stock
1/4 cup Parmigiano cheese
Boil the ravioli until done, drain and toss in hot vegetable stock, add your vegetable of choice and sprinkle with cheese. Add more stock if needed. Serve!
If you'd like traditional pasta sauce I would use Muir Glen Organic Pasta Sauce or if you want to get fancy Rao's Pasta Sauce-the Vodka Sauce is awesome and you could serve this as an appetizer for adults as well.
I WOULD eat that!
Wednesday, February 13, 2008
Mama Flava's Morning Muffins
Here is a recipe I have adapted from the classic Morning Glory muffin (found in cafes and B&Bs.) These muffins are sweet, moist, packed with veggies, and full of some lovely whole grains. They are a real treat for Baby Flava and we love them as well. Make them in large muffin tins for a full meal or in mini muffin tins and pack them as a snack!
Mama Flava's Morning Muffins
3 large eggs
3/4 c sugar
1 c vegetable oil
1/2 c unsweetened shredded coconut
1/2 c shredded apple
1/2 c crushed pineapple (drain the liquid if from a can)
1/2 c shredded zucchini
2 c shredded carrots
1/2 c dried cranberries
1 t vanilla extract
1 c all-purpose flour
1 c whole wheat flour
1/2 c oat bran
1/4 c wheat germ
2 tsp baking soda
1/2 tsp salt
1 T cinnamon
Preheat your oven to 350 degrees and line a muffin tin with paper baking cups. In a large bowl whisk the eggs and sugar together. Slowly add the vegetable oil until well combined. Add the coconut, apple, pineapple, zucchini, carrots, cranberries, vanilla extract and mix well. In a separate bowl combine the flours, oat bran, wheat germ, baking soda, salt, and cinnamon. Add the dry ingredients to the wet mixture and stir until just combined.
Fill each muffin tin completely and bake for 30-35 minutes until a toothpick inserted into the muffins comes out clean. Let the muffins cool and eat immediately or store in an air tight container and enjoy for the next few days. These muffins also freeze very well.
Fill each muffin tin completely and bake for 30-35 minutes until a toothpick inserted into the muffins comes out clean. Let the muffins cool and eat immediately or store in an air tight container and enjoy for the next few days. These muffins also freeze very well.
Friday, February 8, 2008
Spinach, Beet, and Goat Cheese Salad (for baby!)
The other night I made one of my favorite salads: baby spinach, beets, peas, pine nuts, goat cheese, and a simple balsamic/Dijon vinaigrette. The list of ingredients is short (although they can vary) but it packs a ton of flavor. Obviously, salad is not appropriate for BF but that meal got me thinking. There had to be a way to combine these ingredients into something suitable for baby.
It didn't take much experimentation and as it turns out, making a salad for baby is much simpler and tastier that I expected. What follows is my recipe for a spinach, beet and goat cheese salad for baby. Serve this as is or use it as a base to experiment with your own version of a baby friendly salad. Let us know what you think!
Spinach, Beet, and Goat Cheese Salad (for baby!)
1 6oz bag of organic baby spinach
2 medium size beets
1 t olive oil
1 t balsamic vinegar
dash of salt
dash of pepper
crumbled goat cheese
Boil a large pot of water. Once boiling, add the entire bag of spinach to the water and cook until just soft. Immediately transfer spinach to a bowl of ice water to stop the cooking process. Clean and peal the beets. Roast them in the oven or boil them (whichever method you prefer) until they are fork tender. Once the vegetables are cool dice the beets and add them and the spinach to a food processor. Blend mixture until beets begin to break down. Add the olive oil, vinegar, salt, and pepper to taste and continue blending until smooth. Add crumbled goat cheese to the mixture right before serving it to baby.
Wednesday, February 6, 2008
Baby In The Kitchen
 Since the first day of her life BF has spent a lot of time in the kitchen. At first she was underfoot in her bouncy seat just observing all of the hustle and bustle. Then she was sitting up or crawling on the floor trying to pull up on everything. In an effort to keep her safe and entertained (and to stem to tide of drool from teething) I started giving her rubber spatulas to play with.
Now that BF is a toddler, she runs in and out of the kitchen when I am working bringing me toys or plopping down on the floor to read a few books. She also still loves to play with the spatulas and some other assorted kitchen paraphernalia including all-clad pots and (of course) Tupperware bowls. For a while, a fun game for her would be to pretend to "mix-mix" in the bowls with the spatulas before putting the bowl on her head (she also thinks the bowls are "hats.) Recently however, she has expressed an interest in actually mixing the food I am cooking. So, I bring her up and she helps me sautee onions, mix pancake batter, or stir a sauce. Although the onions often end up on the floor or scattered across the range, I continue to let her help at every possible opportunity.
I never had a doubt that BF would grow up in the kitchen but I cannot express how much joy her new interest in cooking has brought to me. It is really never too early to get your kids involved in cooking. Even as a baby there are simple ways to get them to participate in your process and to share with them some basic kitchen skills such as mixing and pouring. What a truly special activity for any mother and child to share together!
Sunday, February 3, 2008
Grammies Swiss Chard and Feta Snacks
Mamma Flava mentioned Amy's Snacks -feta and spinach. Small finger sized little packets of dough filled with a variety of things. I purchased a couple of boxes since MF asked me to figure out what the outside was made of and see if we could make our own. The Amy's Snacks were OK, not a lot of filling and covered with a short crust (a crust which does not contain any leavening so it does not puff up. usually made with half fat to flour ratio and used for pies and tartes.)
I pulled out my pie dough recipe and made a double batch of dough. I made Buffalo Sauce and Cheese Snacks and Swiss Chard and Feta Snacks; now baked and frozen ready for Baby Flava's next visit. That is if we can keep our hands off them...they are scrumptious. And the best part....for the cost of the chard and cheese....I made almost 70 snacks. Much better, cheaper and tastier than Amy's.
One hint: make them round into dumpling shapes instead of square like Amy's, its much easier.
Pie Crust
(makes a single pie crust for a double crust pie, double the am ounts)
1 cup organic unbleached all purpose flour (you may use 1/2 whole wheat)
2 T sugar
1/4 tsp salt
8 T unsalted butter (I used smart balance)
2 T ice water and more as needed (I use 2 T of cold vodka to start-see below for why)
Mix flour, sugar and salt. Cut butter into cubes and add to flour mixture. You place this in your mixer or food processor. Mix/pulse the mixture until the butter and flour are incorporated and look like sesame seeds. I will sometimes finish the process by hand to get a better feel for the dough. Do this quickly so the fat does not melt.
Add 2 T of ice water and m ix. Then continue adding by the teaspoon until the mixture is moist and starts to clump together. Gather into a disc and either use immediately or refrigerate.
Roll your dough on a floured board until very thin. So thin that you can almost see the board through the dough. Cut out 3" circles Fill with a teaspoon of spinach and feta, swiss chard and feta (see recipe below), meatsauce and cheese...etc.. Fold in half over the filling and pinch edges well. You may place a bit of water around half the dough edges to ensure they stay sealed. Place on parchment or lightly sprayed sheet pan and bake at 375 degrees for 10-12 minutes until golden. They puff up slightly (even though a short crust...if make right it puffs as in flaky!). Serve to kids or adults. These may be frozen and reheated for a short amount of time (3-5 minutes in the oven or 1 minute in the microwave). Perfect finger food.
Grammies Swiss Chard and Feta Snack Filling
1 bunch of Swiss Chard (red or green)
1/2 cup Feta Cheese
1 tsp extra virgin olive oil
Cut main rib and stalk out of each leaf. Cut each leaf in half and then in 4-5 pieces. Place in bowl of water and let sit about 5 minutes swishing every once and a while. Drain, rinse and spin dry. Place a teaspoon of water in a saute pan on medium heat. Add the clean swiss chard and cover. Let steam from water left on leaves until the leaves wilt.
Cool and chop. Chop the 1/2 cup of feta and add to swiss chard. Mix and use for filling.
This also make a fantastic filling for an omelete...as we found for breakfast this morning!!
You may cook most greens this simply except the tougher collards which need a longer time to soften.
Saturday, February 2, 2008
Blueberries with Raspberries for Baby

Most of you who read this blog regularly will have seen my post from a few months back about Kiwi fruit in which I bemoaned the lack of fruit options in the winter. Well, once again, I feel like I have fallen into a winter fruit rut. BF loves oranges and kiwis and grapes but to be honest, how many weeks in a row can she eat the same fruit with out getting bored? So ... last night I decided to break us out of our fruit rut with a blueberry/raspberry puree.
In the freezer I had a bag of frozen organic blueberries from Trader Joes and a bag of frozen raspberries that we had picked ourselves last summer. Blueberries are one of those "super foods;" they pack tons of nutrients and antioxidants. Despite what you may think, frozen berries are usually picked, washed, and frozen right away so all of the berry nutrients are retained.
I put a small saucepan on the stove and added the entire bag of blueberries, 1/2 cup of the frozen raspberries, and 1/4 cup of water. I put the burner on low and cooked the berries slowly until they began to melt. Once there was a good amount of liquid in the saucepan I turned up the heat to medium/high and cooked the berries until they formed a thick sauce (about 20 minutes.) Once this mixture was cooled I put it in the blender for a few moments to be sure BF wouldn't have to try and "chew" berry skins or raspberry seeds.
This morning BF had some of the blueberry/raspberry puree with ricotta cheese ... it was a huge hit! I am thrilled that she had something new and interesting to eat that was jam packed with nutritious goodness. Plus, the puree also was fantastic on some multi-grain pancakes we made for ourselves!
Saturday, January 26, 2008
The Beauty of a Well Rounded Diet
Most of us know the value of a well balanced diet. Good for our bodies, good for our energy level and good for our waistline. However, I have recently discovered a new fringe benefit for BF ... no worries for me when she is feeling picky!
Every day I make a conscious effort to make each meal that BF eats a balance of a good protein/dairy, fruits and veggies, and some complex carbohydrates. For breakfast she may have peas and bananas with plain yogurt and half a mini whole wheat bagel. Lunch may be spinach and feta in whole wheat pits pockets and sliced kiwi. Dinner may be salmon and a mixture of roasted red peppers, rice, and broccoli. Because each meal is so complete I never fret on the days that she just refuses to eat dinner. And as BF approaches toddlerhood at full speed I know that there will be many more days ahead when she will refuse certain food items or will just not be hungry for a meal. I will be able to rest easy on those days because she will have gotten a great dose of nutritious food in the two meals that she did choose to eat!
The trick is, of course, finding lots of tasty ways to server your baby foods from a variety of different food groups. Beans are a wonderful cross-over food item for baby. To get a great mix of veggies and protein try our Black Bean Avocado spread, add some lentils to your baby's veggies, or try mixing some veggies into a simple chickpea hummus. Also, don't be afraid to serve veggies for breakfast, sweet English peas are one of our favorites with yogurt so is our staple; banana avocado sauce.
Thursday, January 24, 2008
Zucchini for Baby
One of BF's favorite veggies is zucchini! While looking back at some old posts, I realized that I had never posted this recipe for the zucchini dish I have been making for her since she was 8 months old. So, here is it ... try it out and let us know what you think!
Zucchini for Baby
3 medium sized zucchini
1 small yellow onion
1 T olive oil
1 t freshly ground pepper
dash of salt
Zucchini for Baby will last in the fridge for a few days and it freezes very well. As soon as your baby is ready to move beyond cereals and the basic fruits and veggies this is a great addition to his/her food repertoire!
Zucchini for Baby
3 medium sized zucchini
1 small yellow onion
1 T olive oil
1 t freshly ground pepper
dash of salt
Wash and dry the zucchini, trim off ends and slice into thin circles. Peel the onion and dice it into small pieces. Heat a skillet on the stove and add the olive oil. When the pan is hot, add the diced onions. Saute the onions for approximately two minutes and then add the sliced zucchini and a dash of salt. Cook this mixture until the zucchini slices are soft and slightly browned and then add the ground pepper. Once the zucchini and onions have cooled slightly dump the entire mixture into a food processor. Blend until smooth or until desired consistency is reached.
Zucchini for Baby will last in the fridge for a few days and it freezes very well. As soon as your baby is ready to move beyond cereals and the basic fruits and veggies this is a great addition to his/her food repertoire!
Sunday, January 20, 2008
Squash Pizza
We had a marvelous Squash Pizza at a new restaurant in Philadelphia. The menu description was interesting: squash, mozzarella cheese, raisins and pine nuts. It sounded good so we ordered it. Delicious!!
It came on a paper thin crispy crust, and the squash was cut up small and almost formed the sauce on the pizza with spots of mozzarella cheese and white raisins and toasted pine nuts.
The first bite was a wonderful explosion of savory and just a touch of sweet from the raisins. What an easy healthy dish for BF! Perfect finger food, veggie, protein and a bit of crunch from the pine nuts. If the size and shape of the pine nut concerns you...just give them a quick smash before you put them on the pizza. Also the raisins can be cut in half.
Squash Pizza
1 cup cubed steamed squash (any squash, butternut, acorn etc)
1/4 cup toasted pine nuts
1/3 cup white raisins
1/2 lb of sliced or shredded mozzarella cheese
extra virgin olive oil for drizzling
Cornmeal for under the pizza
1 pizza crust (homemade recipe follows)
Peel, cut and cube your squash. Steam or roast in the oven until tender, mash with a fork and set aside. Toast pine nuts in small pan until slightly brown, set aside.
Roll your pizza crust very thin. Spread mashed squash on dough, sprinkle with mozzarella cheese, toss pine nuts and raisins on top. Drizzle with extra virgin olive oil.
Bake on preheated pizza stone for 10 minutes at 450 or until cheese bubbles. If you do not have a pizza stone, you may bake on a sprayed cookie sheet.
Let cool and cut in wedges.
Homemade Pizza Dough
3/4 cup warm water (105°F to 115°F)
1 envelope active dry yeast
2 cups (or more) organic unbleached flour
1 teaspoon sugar
1/4 teaspoon salt
3 tablespoons olive oil
Dissolve yeast in warm water and let sit about 5 minutes.
Place flour, sugar, and salt in mixing bowl. Add water and yeast. Add oil and knead with dough hook unitl smooth...about 4 minutes. Add more flour if needed. Dough should pull away from side of bowl and leave bowl "clean" as it kneads. (if you do not have a dough hook, you may use a food processor, or do it by hand.)
Place dough in greased bowl and cover with plastic wrap and let dough rise in warm draft-free area until doubled in volume, about 1 hour. Gently take dough out of bowl and knead a few times. Let sit a few minutes and roll out to desired shape. If dough springs back, let it sit a few minutes and rest and roll again.
Fill as desired and bake. You may also use this recipe to make calzone, rolls and bread sticks!
Subscribe to:
Comments (Atom)

